Category How to Find the Apollo Landing Sites

The Future of Man, Moon, and Mars

Mankind’s return to the Moon seems inevitable. Countries such as Japan, India and China have successfully launched unmanned probes and rovers to the Moon. NASA has been planning a return to the Moon for years. Although challenging, the success of the Apollo program serves as a reminder that the Moon is achievable.

Mars is a greater challenge. The risks are many and some of the questions of extended spaceflight have not been answered. If a breakthrough propulsion system could be developed that would shorten a mission to Mars to be equivalent in length to a lunar mission, say a week to 10 days, many of the difficulties of going to Mars would go away. New technologies, such as the VASIMR ion drive, offer hope by shortening the trip to Mars to 39 days.

Like the Moon landings of Apollo, a manned mission to Mars will have an indelible impact on the future of humankind.

What You Need. to Know About. Telescopes

The Moon is an easy and bright target for the beginning, casual, and serious backyard observer. Even with the unaided eye, one can identify the major Mares (or Seas) as the large and seemingly smooth grey areas. However, details of the Moon are dif­ficult to discern with the unaided eye. The Moon is actually much smaller to the naked eye than the average person expects. Popular media and art often depict the Moon as a large celestial object taking up to as much as 20 or 30° of sky. Contrast this to the actual visual diameter of the Moon of a little over a half degree (31.4 arc-minutes). Still the Moon is an easy, large and bright target for a backyard astronomer to study.

With optical aids of either a good pair of binoculars or a good telescope, the Moon comes alive with details. A good pair of 7 x 35 or 7 x 50 binoculars can resolve some of the major craters and other major details on the Moon’s surface. The major mares, or seas can be identified.

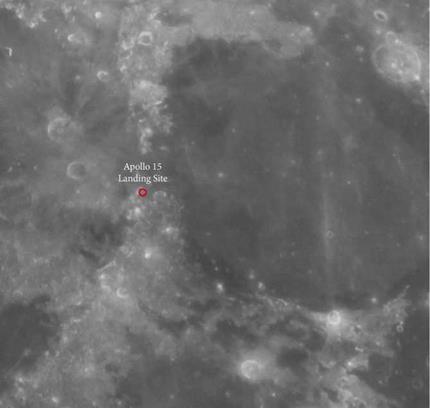
But once the observer starts using a telescope the “OH WOW!” factor comes into play. Telescopes with apertures beginning at 60 mm and larger can produce very satisfying images of craters, mountain ranges, mares and lunar domes. And in the case of this book, a good telescope can help the reader to zoom-in on the Apollo landing sites and appreciate NASA’s great successes.

There are bookshelves full of books, and there are numerous websites on the Internet that offer advice in selecting telescopes, and telescope accessories. Many are well-written, thoughtful, and informative. Some are not. But most offer optical advice either from the well-heeled consumer with a money-is-no-object budget, or from the “best bang for the buck” viewpoint. What is often missing is the common sense approach for selecting the right telescope for the right use.

J. L. Chen, How to Find the Apollo Landing Sites,

The Patrick Moore Practical Astronomy Series, DOI 10.1007/978-3-319-06456-7_2, © Springer International Publishing Switzerland 2014

A useful analogy in buying a telescope is looking at a parking lot of a local gro­cery store. There are a variety of cars and trucks parked there. Why? Because dif­ferent people purchase vehicles for different reasons. Soccer moms need mini-vans to haul their kids to soccer fields. Handymen need pickup trucks to haul plywood and plumbing tools. The thrill-seeker will own a high-performance sports car. And a business man will drive a prestige high priced car to show off wealth and fame.

The same process of selection also applies to telescopes. In this case, there are telescopes that are best used for deep sky objects such as nebulas, galaxies, and star clusters. There are telescopes that excel in astrophotography. And in the case of this book, there are telescopes that excel in observing the Moon and the planets of our solar system.

First-time buyers are faced with a myriad array of telescope choices, and more- often-than-not purchase the wrong telescope for their use. The wrong telescope purchase will end up in the closet gathering dust, or worst yet, in a garage sale. So here are a few basic all-encompassing guidelines in selecting telescopes for astron­omy use, especially for viewing the Moon.

• Buy your second telescope first. The common advice for years from all amateur astronomers is don’t buy a department store telescope. In today’s world that advice extends to warehouse stores and sporting goods stores. Most so-called beginners’ telescopes are plagued with poor optics, shaky telescope mounts, and in some cases poor electronics. Many of these telescopes are aimed at well – intentioned consumers that haven’t taken the time to study the telescope market, and just want a big box under the Christmas tree or at the birthday party. Grandparents especially fall into this trap. By using the term second telescope, most telescope owners who survive the trials of these beginners’ telescopes and still want to pursue the hobby naturally learn to buy a quality telescope the second time around. Save money now by being educated and buy the right equipment first.

• A smaller telescope will get used more than a larger telescope. There is a strange ailment that afflicts every backyard astronomer known as aperture fever. In this bigger-is-better society, the desire for a larger telescope that shows more detail and gathers more light is sometimes overwhelming. But there is a point where a telescope becomes so large and cumbersome to use that the usage of said tele­scope becomes less and less. A smaller and more portable, telescope with easy setup gets used more.

• The telescope mount is as important as the telescope optics. A good, solid and stable telescope mount encourages observers to use their telescope. Nothing is more frustrating than trying to focus a telescope on a weak and poorly designed mount that shakes and vibrates with a slight touch or a slight breeze.

• The right eyepieces for the right job. As with telescope designs, certain eyepiece designs are suited for wide-angle extended celestial objects such as nebulas and open star clusters, while others are intended to high contrast detailed assignments. With the cost of eyepieces ranging from $30 to over $1,000 each, a meaningful and careful selection is appropriate.

• Buy the right telescope that suits your personal skills. Some telescopes are well – suited for the technically inclined. Some telescopes are simple to use. The poten­tial first-time telescope owner needs to understand their own personal skills and acknowledge their abilities before making a telescope selection. Namely, if you can’t change a car tire, or your digital oven clock is always flashing 12 o’clock, certain astro equipment should avoided. And as with the size of the telescope, the easier the telescope is to use, the more likely it will be used.

• Consider a neutral density or polarizing filter for the telescope eyepiece. The Moon, especially when it’s full, can get uncomfortably bright. Not dangerously bright, like the Sun, just uncomfortable. An appropriate filter will tone down the glare to a comfortable level.

• Never point your telescope at the Sun unless properly equipped. This is impor­tant. Serious damage to the human eye occurs when viewing through an unfil­tered telescope. Telescope vendors sell appropriate white-light and hydrogen-alpha filters for safe viewing of the Sun. The previously mentioned neutral density or polarizing filters for the Moon do not offer enough filtering protection for the human eye for solar observing.

• Buy quality. The old adage “You get what you pay for” applies here. Telescopic images are clear and sharp. Mounts work smoothly. Focusers have a buttery smoothness that allows for fine tuning of the focus. High quality telescopes allow the observer to enjoy astronomy without problems getting in the way. In fact, there are numerous examples of quality apochromatic refractors that have appreciated in value, and sell on the used market for more than the original purchase price.

• Support your local telescope store. Believe it or not, the astronomy industry is not a big money, high profit business. With the exception of two dominant major companies, many telescope businesses, either manufacturers or stores, are Mom and Pop operations run by people who love science and astronomy. They have expertise in amateur astronomy, provide quality products, provide personalized service, and are able to perform many repairs in their own shops. The smaller telescope shops struggle to compete with high volume Internet or mail-order firms who offer little or no service and rely on manu­facturers to repair faulty equipment. Consumers need to understand the retail business. There are three criteria for competition: Quality, Service and Price. The consumer can only get two of the three. A lower price means the con­sumer sacrifices either service or quality. It is astounding to note that profit margins of major name brand telescopes are miniscule. For example, a well – known large Schmidt-Cassegrain computer controlled telescope costing over $3,000 will net a profit to a store of $100. Smaller stores rely on accessory sales, service work, and loyal customers to stay in business. Remember, at your local telescope store, there are real people (not a disembodied voice on the phone) who know astronomy, sell and support quality products, support local astronomy clubs, and can fix any problems with telescope equipment (often on the spot).

The Surveyor Series

Fig. 11.1 Surveyor on the moon. Courtesy of NASA

J. L. Chen, How to Find the Apollo Landing Sites,

The Patrick Moore Practical Astronomy Series, DOI 10.1007/978-3-319-06456-7_11, © Springer International Publishing Switzerland 2014

NASA developed the Surveyor Program as the follow-up to the Ranger program. Ranger proved that NASA could hard crash a spacecraft into the Moon. Surveyor was NASA’s opportunity to achieve soft landings on the Moon. Additionally, NASA set scientific goals of Surveyor to gather data about the Moon’s surface, through photographs and digging scoops.

In those early days of the NASA lunar program, very little was known about the Moon’s surface. There were scientists that feared that the Moon’s surface was coated in a thick lunar dust that a lunar lander would be swallowed up and sink into the Moon’s surface. Therefore, Surveyor’s mission included experiments to test the nature of the lunar surface, including a mechanical scoop to test the firmness and granularity of the lunar soil.

As with Ranger, not all of the Surveyor missions were successful. Surveyor 2, originally targeted for Sinus Medii, or Central Bay, suffered a failure in one of its vernier rocket motors, resulting in a tumbling flight to the Moon and its crashing near the Copernicus Crater.
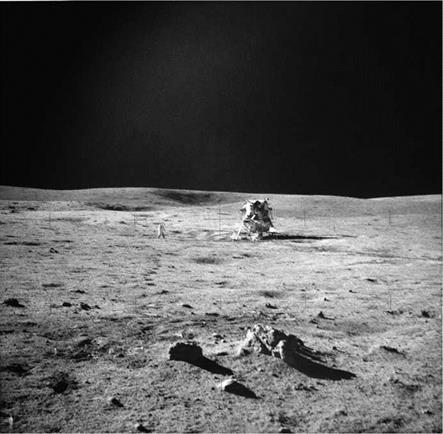
Surveyor 4 also crashed in its mission to Sinus Medii ( a Sinus Medii jinx?!?!). After a faultless flight to the moon, telemetry signals from the spacecraft ceased during the landing phase, about 2.5 minutes before touchdown. Contact with the spacecraft was never reestablished, and the mission failed. The engineers’ specu­lated that the solid fuel retro rocket exploded during the end of its scheduled burn.

In all, seven unmanned Surveyor lunar missions were launched between May 1966 and January 1968. Surveyor 1, 3, 5, 6, and 7 successfully accomplished a soft landing on the lunar surface. In addition to demonstrating the feasibility of lunar surface landings (and not disappearing into the moon dust!), the Surveyor missions obtained lunar photos, and gathered both scientific and technological information needed for the manned Apollo program. Four spacecraft, Surveyor 1, 3, 5, and 6, returned data from selected mare sites to support the Apollo program. Surveyor 7 provided data from a highland region.

Fig. 11.2 Finder chart. Courtesy of the author

Here again, as with sighting the Ranger impact sites, locating and viewing the Surveyor landing sites serves as extra credit to the backyard observer.
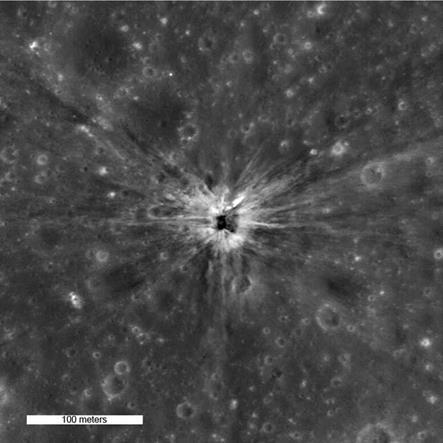
Fig. 11.3 LRO View of Surveyor 1. Photo courtesy of NASA and Arizona State University

Site Selection

All Surveyor landing sites, except for the last one, were selected primarily because they were being considered as Apollo landing sites. The landing site selected for Surveyor 1 was in the southwest part of Ocean of Storms. The spacecraft came to rest within about 15 km of the target point, on a flat surface inside a 100-km crater, one radius from the edge of a rimless 200-m crater.
Mission Description

Launch: 30 May, 1966. Landed: 2 June, 1966, 06:17:37 UT. Landing Site: Flamsteed P (2.45°S latitude, 316.79°E longitude)
Surveyor 1 was the first U. S. spacecraft to land softly on the Moon, proving a variety of new equipment and spacecraft design, and validating the technique for landing on the Moon. It returned a large quantity of scientific data during its first two days of operation on the lunar surface. Following its landing, the spacecraft transmitted 11,240 high-resolution television pictures back to NASA. Surveyor 1 completed its primary mission on July 14, 1966, after transmitting television pictures, data on the bearing strength of the regolith, temperatures, and radar reflectivity of the Moon. Subsequent engineering interrogations of the spacecraft were conducted through January 1967.

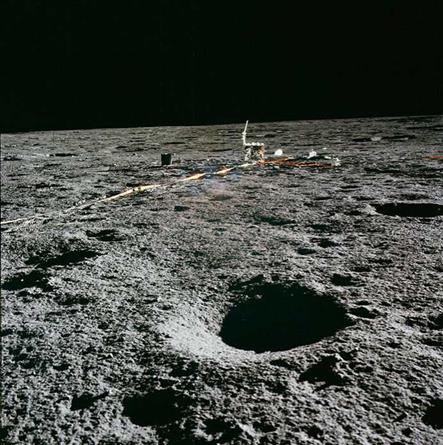
Fig. 11.4 Mission photo of Astronaut Conrad and Surveyor 3. Courtesy of NASA

Site Selection

The site selected for Surveyor 3 was in the southeast part of Ocean of Storms. The spacecraft came to rest in a subdued, rounded crater about 200 yards in diameter approximately 230 miles south of the Copernicus Crater. This site became a future landing site of an Apollo mission. As seen in Chapter 4, Apollo 12 landed within walking distance and astronauts Pete Conrad and Alan Bean visited Surveyor 3 and returned with component parts of the spacecraft for examination and study by NASA engineers.

Fig. 11.5 Mosaic taken by Surveyor 3. Courtesy of NASA

Mission Description

Launched: 17 April, 1967. Landed: 20 April, 1967, 00:04:53 UT. Landing Site: Ocean of Storms (2.94°S latitude, 336.66°E longitude).

The data from Surveyor 3 showed that it touched down on the lunar surface three times before the landing was completed. Surveyor 3’s engines did not shut down as intended. The spacecraft moved approximately 65 feet between the first and second touchdowns and about 36 feet between the second and third. The engines finally shut down prior to the third touchdown. A final translation movement of about 1 feet occurred following the third touchdown.

Like its predecessors, this mission carried a survey television camera, as well as other instrumentation for determining various properties of the lunar surface mate­rial. Additionally, it carried a surface sampler instrument for digging trenches, making bearing tests, and otherwise manipulating the lunar material in view of the television system. During its operation, which ended May 4, 1967, Surveyor 3 acquired a large volume of new data and took 6326 pictures. The surface sampler, during its 18 hours of operation, accumulated samples which yielded significant new information on the strength, texture, and structure of the lunar material to a depth of about a half a foot.

Fig. 11.6 Mosaic of Surveyor 5 photos showing the Surveyor landing strut and foot pad. Courtesy of NASA

Site Selection

The site selected for Surveyor 5 was in the southwest part of the Sea of Tranquillity. Surveyor 5 landed in a dimple-shaped, two car garage-sized rimless crater, the larg­est of a small chain of rimless craters. A backyard observer when sighting the Apollo 11 landing site will also have the Surveyor 5 site within the field of view.

Mission Description

Launch: 8 September, 1967. Landed: 11 September, 1967, 00:46:44 UT. Landing Site: Sea of Tranquility (1.41°N latitude, 23.18°E longitude).

This spacecraft was basically similar to its predecessor, except that the surface sampler was replaced by an alpha-backscatter instrument. In addition, a small bar magnet was attached to one of the footpads. Because of a critical helium regulator leak, a radically new descent profile had to be designed for the spacecraft. Surveyor 5 performed flawlessly and landed softly. Once safely on the Moon, the spacecraft functioned well and outperformed the previous missions. During its first lunar day

of operation on the Moon, 18,006 television images of exceptional quality and high scientific content were returned to Earth. On October 15, 1967, after having spent 2 weeks in the deep freeze of a lunar night, Surveyor 5 responded immediately to the first turn-on command and resumed operation, returning 1048 additional pic­tures and 22 hours of additional data.

The Surveyor 6 Mission

Fig. 11.7 Panoramic Lunar mosaic from Surveyor 6. Courtesy of NASA

Fig. 11.8 Panoramic Lunar mosaic 2 from Surveyor 6. Courtesy of NASA

Site Selection

The landing site chosen for this mission was in Sinus Medii, site of two previous Surveyor failures. The Sinus Medii curse was finally broken, with Surveyor 6 land­ing in the center of the Moon’s Earth-facing hemisphere. Surveyor 6 marked the last of four potential Apollo landing areas designated by the Surveyor program planners. The spacecraft landed on a nearly flat, heavily cratered mare area, about 200 yards northwest of the base of a ridge about 100 feet high.

Mission Description

Launch: 07 November, 1967. Landed: 10 November, 1967, 01:01:06 UT. Landing Site: Sinus Medii (0.46°N latitude, 358.63°E longitude).

The performance of Surveyor 6 on the lunar surface was virtually flawless. From touchdown until a few hours after sunset on November 24, 1967, the spacecraft transmitted 29,952 television pictures and the alpha-scattering instrument acquired 30 hours of data on the chemical composition of the lunar material.

As part of the surface mechanical properties investigation, Surveyor 6 performed a “hop” maneuver, moving 2.5 m away from its original landing area. This maneu­ver provided excellent views of the surface disturbances produced by the initial landing and the effects of firing rocket engines close to the lunar surface. Photography obtained after the hop contributed to the soil mechanics investigation.

On November 26, 1967, the spacecraft was placed in hibernation for the two – week lunar night. Contact with the spacecraft was resumed for a short period on December 14, 1967.

The Surveyor 7 Mission

Fig. 11.9 Panoramic Lunar mosaic from Surveyor 7. Courtesy of NASA

Site Selection

Surveyor 7 was the only unmanned pre-Apollo landing mission sent to an area for mainly scientific reasons. All of the previous Surveyor missions were targeted for safe mare regions. The Surveyor 7 site selection was for a highland region with a rugged, rock-strewn ejecta blanket near Tycho Crater. The spacecraft landed less than 1.5 miles from the center of the target circle, about 18 miles north of the rim of Tycho. The backyard astronomer needs merely to sight the Tycho Crater and view the north rim to view the Surveyor 7 landing site.

Mission Description

Launch: 07 January 1968. Landed: 10 January 1968, 01:05:36 UT. Landing Site: Tycho Crater North Rim (41.01°S latitude, 348.59°E longitude).

Despite the more hazardous terrain in the landing area, Surveyor 7 landed without incident. 20,993 television pictures were obtained during the first lunar day.

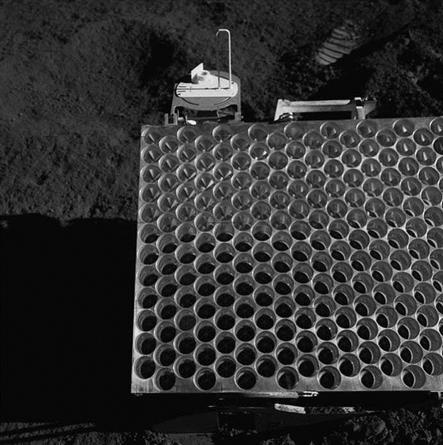
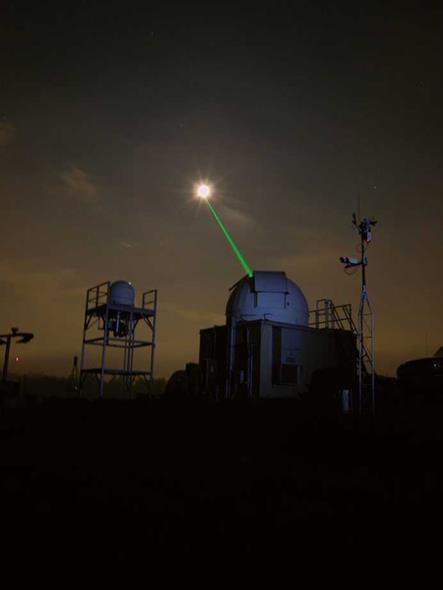
An additional 45 pictures were obtained during the second lunar day. The alpha­scattering instrument failed to fully deploy on its own, so the surface sampler was used to place the instrument on the surface, and enabling the device to function. The surface sampler moved the alpha-scattering instrument to two other locations for more data gathering. In addition to acquiring a wide variety of lunar surface data, Surveyor 7 also obtained pictures of Earth and performed star surveys. Laser beams from Earth were successfully detected by the television camera in a special test of laser-pointing techniques, as a proof-of-concept prelude to the Apollo LRRR experiment.

Post-sunset operations were conducted for 15 hours after local sunset at the end of the first lunar day. During these operations, additional Earth and star pictures were obtained, as were observations of the solar corona. Operation of the spacecraft was terminated 80 hours after sunset. The spacecraft was reactivated for the second lunar day on February 12, 1968, and operated until February 21, 1968.

Abbreviations and Acronyms

Those of us who have spent our careers in Government and military service are familiar with the term “Alphabet Soup”. The U. S. Government, the U. S. Armed Services, and in the case of the lead government agency of U. S. space exploration NASA (yes, an abbreviation. See.. .Alphabet Soup!) all use shortened abbreviations and acronyms to simplify and manage ideas, concepts, and equipment. In technical fields, abbreviations and acronyms work well as vocabulary shorthand.

But, in highly complex programs such as Apollo, the sea of acronyms created is blindingly confusing and complex to an outsider. This book, like many NASA- related books that have preceded it, contains many examples of NASA’s alphabet soup. An effort was made to minimize the use of NASA’s shorthand, but inevitably it cannot be avoided. Hence, this list is provided to the reader as a reference.

ALSEP Apollo Lunar Surface Experiments Package ASE Active Seismic Experiment

CM Command Module

CPLEE Charged Particle Lunar Environment Experiment

CCGE Cold Cathode Gauge Experiment

CCIG Cold Cathode Ion Gauge

CSM Command/Service Module

EASEP Early Apollo Surface Experiments Package

FTT Fuel Transfer Tool

HFE Heat Flow Experiment

LACE Lunar Atmosphere Composition Experiment

LEAM Lunar Ejecta and Meteorites Experiment

LM Lunar Module (earlier known as the LEM for Lunar Excursion Module)

LRO Lunar Reconnaissance Orbiter

LRV Lunar Roving Vehicle “Lunar Rover”

LRRR Laser Ranging Retroreflector

LSPE Lunar Seismic Profiling Experiment

LSG Lunar Surface Gravimeter

LSM Lunar Surface Magnetometer

MESA Modularized Equipment Stowage Assembly (Lunar Module trunk)

MET Modularized Equipment Transporter

PLSS Portable Life Support System (high-tech backpack)

PSE Passive Seismic Experiment

PSEP Passive Seismic Experiment Package

RTG Radioisotope Generator

SEP Surface Electrical Properties experiment

SM Service Module

SWS Solar Wind Spectrometer Experiment

SIDE Supra-thermal Ion Detector Experiment

The Telescopes

The Telescopes

Fig. 2.1 Group photo of the author’s collection of telescopes. Courtesy of the author

The world of astronomy is inhabited by a menagerie of telescopes. There are short – focus and long-focus refractors, Dobsonian reflectors, Schmidt – or Maksutov – Cassegrains, Newtonian reflectors, GOTO telescopes, achromats, apochromats,… the list goes on and on. There are telescopes of every size and for every budget. Some with manual altitude-azimuth mounts, some with German equatorial mounts, and some with very sophisticated electronic GOTO mountings. It’s no wonder that a person new to astronomy gets confused and intimidated.

The following discussions on telescope types demands a definition of focal ratio, or f/ratio. Quite simply, the f/ratio is the focal length of the telescope divided by the diameter of the main lens or mirror. The smaller the f/ratio, the lower the magnifica­tion and the wider the field of view with any specific eyepiece. Higher magnifica­tion is easily attained with a higher the f/ratio, but with the cost of a smaller field of view.

In order to simplify the world view of amateur astronomy, it is best to organize telescopes into the three basic categories: refractors, reflectors, and catadioptrics.

The Scientific Investigations

The primary objective of Surveyor was developing and testing the soft landing technology for on the Moon. These lessons learned were then applied to the Apollo spacecraft design. The Surveyor program also had the objective of gaining scien­tific knowledge of the Moon. A number of experiments were designed into the Surveyor lander for scientific purposes. A comparison of the pre-Apollo Surveyor experiments and the Apollo ALSEP suite shows a continuity of scientific inquiry into the nature of the Moon.

Each spacecraft weighed 1000 kg at launch, was 3.3-m high, and had a 4.5-m diameter. The tripod structure of aluminum tubing provided mounting surfaces for scientific and engineering equipment. Onboard equipment consisted of a 3-m-square solar panel that provided approximately 85-W output, a main battery and 24-V non­rechargeable battery that together yielded a 4,090-W total output, a planar array antenna, two omnidirectional antennas, and a radar altimeter. The soft landing was achieved by the spacecraft free falling to the lunar surface after the engines were turned off at a 3.5-m altitude. Operations began shortly after landing.

. Recommended. Reading

These recommendations are divided into two general categories, books about the Apollo Program and books that help the reader on selecting binoculars and tele­scopes for backyard use. These are books that I have found personally informative and enjoyable. Apologies to the authors of books not listed here. Had I had gotten around to reading them, I’m sure I would have included them on the list.

Apollo Program

Barbree, Jay, Live from Cape Canaveral, Smithsonian Books, Harper-Collins Publishers, 2007.

NBC News veteran reporter Barbree presents the space program from the news correspondent’s point-of-view.

Bean, Alan with Andrew Chaikin, Apollo, Greenwich Workshop Press, 1998.

Astronaut Alan Bean’s account of the Apollo program, told in words and his paintings. Some of his original artworks have actual moon dust mixed into the paints. I am in proud procession of an autographed poster of his artwork and an autographed copy of this book. My family and I had the pleasure of meeting him at a book signing in Crofton, Maryland in October, 1998. He is a true gentleman and an American hero.

Chaikin, Andrew, A Man on the Moon – The Voyages of the Apollo Astronauts, Penguin Books, 2007.

This book is probably the definitive single volume book about the Apollo Program. Tom Hanks referenced this opus as a major source for his HBO series From the Earth to the Moon.

Kranz, Gene, Failure is Not An Option, Simon and Schuster Paperbacks, 2000.

As a flight director in NASA’s Mission Control, Kranz recounts all the trials and tribulations of the NASA space programs leading up to and including the landings on the Moon. Kranz provides behind-the-scene accounts, with an emphasis on the control room and flight planning aspects of the Apollo Program.

Murray, Charles and Catherine Bly Cox, Apollo – The Race to the Moon, Simon and Schuster, 1989.

As a retired engineer, I found this book fascinating as it presents the Apollo Program from the engineering point-of-view.

Shepard, Alan and Deke Slayton, Moon Shot – The Inside Story of America’s Race to the Moon, Turner Publishing, Inc., 1994.

There are a number of astronaut-written accounts of the Apollo Program, and I found this one particularly compelling as it covered Apollo through all the Moon landings, and included Deke Slayton’s Apollo-Soyuz mission.

The Refractors

Ask someone to close their eyes and picture in their mind a telescope. Or better yet, ask a child to take a crayon and draw on a piece of paper a picture of a telescope. More likely than not, the image of a long tube pointed at the skies with an observer peering through the opposite end is the result. The refractor is the intuitive concept of a telescope.

Historically, the refractor is the earliest design for telescopes, with the earliest examples appearing in the Netherlands in 1608. Spectacle makers Hans Lippershey and Zacharias Janssen are two of the early creators of the design. Within a year or two Galileo created his own improved refractor design, pointed his telescope into the night sky, and history was made.

Conceptually, a refractor is a system of lenses with an objective lens system to gather light and an eye lens system to focus the light gathered by the objective lens into an image for the observer. Hence, the intuitive mental picture of a long tube with an objective lens pointed at the sky and an observer viewing through the oppo­site end focusing the eyepiece.

Inch-for-inch, refractors are regarded by the astronomy community as the best performing telescopes. Sharp, pin-point star images, and high contrast planetary images are their hallmark. Four inch or larger diameter refractors are the primary instruments of lunar and planetary observers. Astrophotographers have adopted apochromatic refractors as their go-to telescopes, producing the sharp and contrasty images that rival professional observatories.

In today’s world of refractor telescopes, there are achromats and apochromats, terms created to differentiate the levels of color correction of the respective lens systems. Grade school science demonstrates that sunlight passing through a prism separates sunlight into its constituent colors. In optical systems, such as telescopes, all types of optical glasses exhibit some degree of separation and dispersion of light into primary and secondary colors.

The Refractors

A classic achromatic refractor uses a two lens objective, with one lens made of crown glass, and the other lens made of flint glass. With the lenses ground with proper curves and using glasses with different refractive indices, the result is a telescope that can bring to focus two of the three prime colors of light, typically red and blue wavelengths. So conceptually, the achromat can produce an improved image of a distant object over a single lens objective of the type used by Galileo. In practice, there are some color errors, or chromatic aberrations, that creep into the visual performance of an achromatic refractor, especially at shorter focal lengths. The primary colors do not focus at the same point, resulting in a color fringe around Moon, planets or bright stars. This chromatic aberration also results in diminished sharpness and definition in the telescope image. Many classic early refractors typi­cally have focal ratios of f/11, f/15, or f/20 or greater to minimize chromatic aber­rations and become “color-free”. Even at long focal lengths, achromats can display chromatic aberrations, where the secondary colors of yellow and purple wave­lengths do not come to focus.

This technical discussion gives the impression that achromats are flawed. That couldn’t be farther from the truth. Today’s achromatic designs use different types and combinations of Extra-low Dispersion, or ED, glass to lower the chromatic aberrations to a minimum. Modern designs of achromats have minimized the false color to a high degree. One current builder of high quality refractors has taken advantage of new glass technology and our light polluted skies. With a combination of ED glasses, altered lens curves, and adjusting the air spacing between the two lenses of the doublet, the color error in the violet wavelengths match the not-quite – black-really-deep-purple light polluted background sky, resulting in an excellent performing telescope that produces sharp and crisp images with the color error conveniently and cleverly hidden in the background. There are specialized long focus 102 mm achromatic refractors on the market with f/11 focal ratios or greater specifically designed for viewing the Moon and the planets. These modern “planet killers” take advantage of low dispersion glasses and long focal length to provide images that rival apochromatic refractors at one third the cost.

The Refractors

Sometime in the 1980s, the apochromatic refractor became commercially available to the amateur astronomy market. Sophisticated designs appeared using combinations of two, three, or four lenses of exotic glasses. Advanced telescope owners found themselves developing and reveling in a new vocabulary that included terms such as fluoro-crown, lanthanum, fluorite, FPL-51 or -53, APO – triplet, and Petzval. These apochromats offered improved sharpness, contrast, and color correction over the classic achromat refractors, while at the same time creat­ing a more portable telescope with f-ratios of f/8 or less. But this optical perfor­mance improvement is costly. Apochromats are typically 2-10 times more expensive that an equivalent aperture achromatic refractor. Apochromats get expen­sive very quickly as the size increases. A typical 80 mm apochromat retails in the $700 range. A 102 mm triplet can easily cost over $2,500. 130 mm apochromats range fall into the $4,000-$5,000 realm, and you can buy a car with the money needed for larger apochromats.

The old telescope salesman explanation of an achromat refractor is a “color-free image”, meaning no color fringing in the telescopic image. The telescope salesman pitch for an apochromat is “this time, I’m serious! It’s color-free!”. Depending on the sensitivity and sensibility of the observer, the image improvement of an apo – chromat over an achromat can be either a slight or a day-night difference. A lot depends on the sensitivity and sensibility of the refractor owner. From a technical viewpoint, there is no question that the apochromatic refractor offers the best tele­scopic images over an achromatic refractor. In fact, as discussed later in this chap­ter, an argument can be made that an apochromat is inch-for-inch better than every other telescope design, whether refracting, reflecting, or catadioptric.

The Refractors

Countless astronomy books and websites over the years have presented valid arguments that the Newtonian reflector represents the most “bang for the buck” in telescopes. Originally designed by Sir Isaac Newton in 1668, this telescope represents a simple design using either a spherical or parabolic main mirror to collect light and a flat diagonal mirror to reflect the collected light to the eyepiece and the observer. By limiting the number of optical surfaces that need to be accu­rately figured and polished to two, the cost for a Newtonian telescope can be minimized. In contrast, a doublet refractor needs four optical surfaces, and a triplet apochromat needs six optical surfaces to be accurately ground, figured, and polished. The Newtonian design, being reflective in nature, has no chromatic aberrations and can be constructed from less expensive materials. During the explosive growth of Newtonian telescopes in the 1980s, with John Dobson’s unique implementation of the design, Newtonians could be made from Pyrex glass, cardboard tubes, and plywood.

Sounds like the perfect telescope. An 8 in. Newtonian reflector on a Dobsonian mount can be easily acquired for the price of a 3-in. achromat refractor. That is a lot of performance for the money.

But there is a catch. Ask any telescope dealer, any telescope salesman, or any member of your local astronomy club, “What is the most common telescope problem?” Nine times out of ten, owners of Newtonian telescopes are unable to align the optics of their telescopes. The main mirror is tilted, the diagonal is not centered, the tilt of the diagonal needs adjustment, or a combination of all three leads to frustration for the telescope owner, resulting in a telescope that ends up in the closet. Whereas refractors and some catadioptric designs do not need col – limation alignment under normal use, Newtonian telescopes require frequent maintenance. This alignment skill is easily acquired by some, while others find the alignment task difficult. Some telescope owners take collimation in stride, while others find it a nuisance.

The Refractors

The Refractors

Fig. 2.6 The Maksutov-Cassegrain Telescope. Courtesy of Adam Chen

Catadioptric telescopes are a category of telescopes that combine lens and mir­ror technology to produce compact and transportable instruments. With a clever combination of a lens and mirrors, the incoming light path is folded upon itself, and any optical aberrations of the reflecting surfaces can be corrected by the refracting lens.

Catadioptrics are available in two popular forms: Schmidt-Cassegrain tele­scopes, or SCT and the Maksutov-Cassegrain telescope. Maksutov-Cassegrains appeared on the commercial market in the mid-1950s, and SCT’s burst into popu­larity in the 1970s. As a family, catadioptrics offer a high degree of optical perfor­mance and low maintenance in a small compact package.

Although SCTs are available in sizes from 5-in. to massive 14 and 16 in. aper­tures, the most popular and best-selling telescope since the 1970s has been the 8-in. SCT. The 8-in. SCT is the basic core product for not one, but two major telescope companies. The reason for this popularity stems from the all-around versatility that the design provides. As an analogy, the 8-in. SCT is the Olympic Decathlon Champion of telescopes. The Olympic Decathlon gold medalist doesn’t excel in any singular competition, such as the 100 m dash or the high jump, but is able to per­form 10 different events better than anyone else can perform those same events. Versatility and a high level of performance are outstanding attributes of an 8-in. SCT. The 8-in. aperture allows for light gathering for deep sky objects, the typical f/10 focal length enables high magnification for lunar and planetary observations, numerous attachments are available for photographic use, and the compact size ensures frequent usage. But it’s not perfect for any singular use. Newtonian tele­scopes are available at a cheaper price in larger sizes for deep sky light gathering. Refractors produce images that are of better quality in contrast and sharpness. Many amateur astronomers tend to own two, three, or more telescopes in order to optimize their viewing. But if a person is only going to own one single telescope that is capable of handling multiple astronomy tasks, the 8-in. SCT is the likely choice.

Maksutov-Cassegrain, or Maks for short, are highly popular smaller telescopes in the 3.5-6 in. diameter range. Costing from $400 to an astronomical (pardon the pun!) $4,000, these little gems of the telescope world are available in every configu­ration conceivable. Maks tend to have long focal lengths in the f/12 to f/15 range, which helps to improve contrast but limits the field of view. Available on simple manual mounts, to equatorial mountings, to high tech computerized go-to systems, Maks are as versatile as their SCT counterparts. Due to the compact size, Maks make excellent travel scopes.

The natural question that arises from all these discussions of telescope design is: What telescope is ideal? Recalling the car analogy, it depends on the type of observing.

For observing the Moon and planets, the answer is clear. Refractors offer the sharpest, clearest, and most contrasty images. But why? A discussion is needed on the difference between unobstructed and obstructed optics. As seen in Figs. 2.4, 2.5, and 2.6, the Newtonian and the catadioptric designs share a common attribute of a secondary mirror that is centrally located along the light path. These secondary mir­rors allow for the folding of the light path to direct the incoming light to the eyepiece. In the case of the Newtonian, the secondary diagonal serves to guide the light to the side of the telescope to the focuser. In both catadioptric designs, the secondary mirror fold the light path creating a very compact telescope that enables portability. The commercially available Newtonians have secondary mirrors that measure approxi­mately 30-35 % the diameter of the primary mirror. Most SCTs and Maks the central obstruction of the secondary mirror constitutes 40 % the diameter of the primary mirror. The main impact of the central obstruction is a decrease in sharpness and contrast in the telescope image. What is the difference in performance between the unobstructed refractor and an obstructed design? The best analogy is to compare the familiar standard definition TV versus HDTV. A good SCT or short-focus Newtonian will offer a good lunar image like that of a standard 480i digital TV image, but a good ED achromat or apochromatic refractor is like watching a 1080p high-definition TV.

Any of these telescope designs can be used to view the Moon. If the reader of this book currently owns a telescope, proceed to the following chapters and find the Apollo landing sites and enjoy. To those looking to purchase a telescope, the fol­lowing recommendations are offered based on telescope technology, decades of amateur astronomy field experiences, and telescope retail experience:

• For lunar and planetary observing, an 80 mm-to-102 mm refractor is the top choice. These refractors are light, portable, and low maintenance telescopes that offer sharp contrasty images of the Moon and planets. Remember, the reason that large telescopes exist is to act as light buckets and gather the faint distant light of stars, galaxies, and nebulas. The Moon is bright. Really bright. Light gathering is the least of your problems in lunar observing. And when aperture fever occurs, and a larger bulkier telescope is acquired, the refractor takes the role of the easy-to-use, grab-and-go scope. No wasted money here.

• As discussed earlier, it’s hard to argue against an 8-in. SCT. Yes, the lunar images are a little soft compared to a 102 mm apo refractor, but the overall versatility cannot be denied.

• A long focus f/10 or greater Newtonian has a central obstruction approximately 25 % of the primary diameter, and comes very close to refractor image quality. These telescopes are difficult to find in the commercial market, but there are some of these gems on the used market.

• 90-125 mm Maksutov-Cassegrains should also be considered, especially when small size is a requirement.

The Eyepieces

The Refractors

Fig. 2.7 The Author’s Collection of Telescope Eyepieces. Courtesy of the author

Telescope design is only half of the optical story. The rest of the story are the eye­pieces at the focus end of the telescope. And here again, there’s another zoo filled with strange and wonderful denizens that are vying to complete the optical train. Kellner, Abbe, Konig, Brandon, and Nagler are all names of optical designers who have lent their names to their eyepiece designs, and are now an accepted part of the astronomy vocabulary. There are 0.965, 1.25, and 2 in. eyepieces. Some designs have been around for over a century, and some designs are less than a decade old. And most have valid use in astronomy.

The Refractors

Fig. 2.8 (a) Huygens. Courtesy of the author. (b) Ramsden. Courtesy of Adam Chen

Two of the oldest and simplest of the compound eyepiece designs are the Ramsden and Huygens. Originating from the 1700s, these eyepieces serve as historic curiosities. Occasionally, an antique Ramsden will show up at swap meets, eBay, or even antique stores. The Huygens eyepieces are still supplied in 0.965 in. size on cheap beginner telescopes sold at department stores and big-box stores. Both designs are flawed, with narrow apparent fields, chromatic aberration, and short eye relief.

The Refractors

Fig. 2.9 Kellner design. Courtesy of Adam Chen

In the mid-1800s, the Kellner eyepiece was developed by replacing the singlet eye lens element of a Ramsden with a achromat doublet. This resulted in a better performing design with a wider field, better color correction, and less spherical aberrations. When used on long focus telescopes, Kellners still produce a reason­ably good image. The main shortcoming of the Kellner is ghosting when looking at bright objects. So Moon watchers beware! The design exists today under various names, including Modified Achromat, RKE, and modified Kellner. These eyepieces are a good economical alternative for those on a budget.

The Refractors

Fig. 2.10 orthoscopic. Courtesy of Adam Chen

The Refractors

Fig. 2.11 The Plossl orthoscopic. Courtesy of Adam Chen

The Refractors

Fig. 2.12 The Konig orthoscopic. Courtesy of Adam Chen

An examination of the patents for the Abbe, Plossl, and Konig eyepiece designs describes all three as orthoscopic designs. The term “orthoscopic” means free from distortion. In common astronomy vernacular, the term orthoscopic has evolved to become synonymous in name with the Abbe design.

The Abbe has stood the test of time. Since the 1950s, through the growth of amateur astronomy in the 1960s and 1970s, the Abbe design has been highly regarded for sharp and high contrast images. The classic “volcano top” Abbe ortho – scopic, so named for its distinctive beveled shape, are well-known and are highly desired. These Abbe eyepieces have been made by an optician from Japan named Tani-san, whose retirement in 2013 brought an end to decades of Circle T volcano top eyepieces. But don’t fret, Abbe orthoscopic eyepieces are available through other sources. The Abbe orthoscopic eyepiece was held up as the pinnacle of eye­pieces until the advent of new revolutionary wide-angle and high eye relief eye­pieces in the 1980s. Today, dedicated lunar and planetary observers still insist on Abbe eyepieces today.

The Plossl eyepiece has a interesting reputation in the amateur astronomy world. In the 1960s, the Plossl only existed as a rare and mysterious eyepiece, commer­cially available from a small vendor in Europe. Then in the 1980s, Plossls suddenly became widely available, to the point now where it is so commonplace that the eyepiece is considered mediocre by average backyard astronomer. Nothing could be further from the truth. Although poorly manufactured examples exist, a premium Plossl is an extraordinary eyepiece, versatile in lunar, planetary, and deep sky use. There exists a number of variants of the design in which an extra lens or two to the system, somewhat blurring the definition of a Plossl, but these variants tend to be of high quality and offer high performance.

Not as widely available as the other orthoscopics, the Konig design has its fans. Depending on the implementation, the Konig potentially offers a wider field-of – view than the Abbe or Plossl. In practice, the Konig achieves a wider field, but with a slight sacrifice of edge of field sharpness, and slightly shorter eye relief.

A variant of the Konig design is the Brandon eyepiece. Chester Brandon devel­oped his eyepiece design during his time at the Frankford Arsenal in Philadelphia. The eyepiece design was widely used during World War II in U. S. Army optics. The Brandon design differs from the Konig by using three high index glass types and four different lens radii. When marketed in the 1950s as a high priced premium eyepiece, the Brandons were priced at $15.95. My how times have changed, with the price of Brandons and many premium eyepieces in the three-digit range. With sharp crisp contrasty images, the Brandon reputation exceeded that of any other 1950s eyepiece, and is still the go-to eyepiece for many lunar and planetary observers today.

The Refractors

Fig. 2.13 (a) The Erfle. Courtesy of the author. (b) Modern Wide-Angle. Courtesy of Adam Chen

During World War II, a number of scopes used for spotting or for aiming weap­onry by the American armed forces were equipped with Erfle eyepieces. In the 1950s and 1960s, war surplus Erfle eyepieces became available for amateur astron­omers seeking wide-angle views through their telescopes. With an apparent field of view of approximately 60°, these large eyepieces created a demand for wide field eyepieces. That wide-angle demand has grown over the years, to the point now where the consumer demand for ever wider fields of view drives the eyepiece industry. The Erfle does not display as sharp an image in the center of the field as the orthoscopic eyepiece, and a degradation of the image occurs in the outer third of field. Newer modern wide-field designs use exotic glass types and different lens configuration and curves to correct the edge degradation, while at the same time providing a wider field of view.

The Refractors

Fig. 2.14 The Nagler and related ultra wide angle eyepieces. Courtesy of Adam Chen

The quest for an ever wider field-of-view exploded with the introduction of the Nagler eyepiece. Competitors quickly followed, with virtually every telescope company offering their version of an over 80° field-of-view eyepiece. The ante was raised again with the introduction 100° and even wider field-of-view eyepieces in recent years. These eyepieces contain seven or more lenses in their complex designs in an effort to provide wide fields without sacrificing sharpness at the edge of the field. These eyepieces are not cheap, with many exceeding the cost of many telescopes! These eyepieces are outstanding for deep sky and wide field applica­tions. However the complex design, high number of optical surfaces, plus the inevi­table, although slight, light absorption caused by the amount of glass in the light path, these ultra wide angle eyepieces do not offer the same level of sharpness and contrast as the simpler orthoscopic designs.

The Refractors

Fig. 2.15 The Barlow lens. Courtesy of Adam Chen

While not an eyepiece, a Barlow lens is a useful addition to every eyepiece case. A Barlow lens is a negative lens system placed along the light path between the objective and the eyepiece that increases the effective focal length of the telescope, therefore increasing the magnification. Typically, Barlows double (2x) or triple (3x) the magnification. Newer focal extenders using three or four lens elements are available to quadruple (4x) or quintuple (5x) the focal length. These accessories are useful in three ways. A single Barlow lens effectively doubles the number of mag­nifications available in an eyepiece collection. The use of a focal extender also allows longer focal length eyepieces with their higher eye relief to be used at higher magnifications for eyeglass wearers. The use of a Barlow lens can improve the off – axis edge sharpness of some eyepiece designs. The Barlow lens and related focal extenders are also useful for astrophotography.

Some discussion is needed on the subject of zoom eyepieces. In the 1960s, the zoom eyepiece earned a reputation for mediocre optics and was not worth the money. Today’s zoom eyepieces deserve some attention. Improvements in lens coat­ings, the introduction of high index glass, and improved manufacturing has yielded a modern zoom that is worthy of a spot in an observer’s eyepiece case. Although still narrower in field-of-view at longer focal lengths, and wider at shorter focal lengths, the performance has been greatly improved. A zoom eyepiece will not take the place of an eyepiece collection for critical observing, but serves the role for quick look situations, or when showing the night sky to children whose short attention spans don’t allow for the changing and refocusing of conventional eyepieces to change magnification. Viewing the Moon through a 102 ED refractor with an 8-24 mm zoom eyepiece served as an inspiration for the title and subject of this book.

The driving criteria for eyepiece selection for lunar and planetary observing is sharpness and contrast. The rule of thumb for selecting the right eyepieces for view­ing the Moon is “the simpler the better”. The classic Abbe, Plossl and Brandon designs are the preferred choices. There are more esoteric lunar and planetary eyepiece designs based on the monocentric design, or on proprietary designs. These are not discussed here due to their low availability.

There is an Achilles heel to the three classic orthoscopic designs. The older eyepiece designs perform best in longer focal length telescopes. In the era in which these designs originated, telescopes had long focal lengths, typically f/10 or greater. At f/20, even the lowly Ramsden design performs well. But many of today’s tele­scopes have much shorter focal lengths, often f/6 or shorter. The classic designs suffer from loss of edge sharpness because of the steeper angle of the light cone from the objective as it enters the eyepiece. Modern designs take into account the shorter focal length telescopes of today. The design rationale for many of the updated configurations of the Plossl design has been to widen the field-of-view and improve performance with short focal length telescopes.

The recommendation for the ideal eyepiece for lunar observing is as follows:

• For telescopes with a focal length of f/7 or greater, the Abbe or Plossl designs will perform at the highest level.

• For telescopes with focal lengths of less than f/6, the modern variants of the Plossl are suggested.

• For observers who must wear glasses while viewing, there are some proprietary eyepiece designs that provide 20 mm of eye relief. These tend to be premium eyepieces that use exotic lens configurations and glasses, and therefore are not cheap. But they are recommended for eyeglass wearers.

• Consider using a Barlow in combination with a low – or medium-power eyepiece in order to obtain higher magnifications. The comfortable eye relief from this combination is often preferred by both eyeglass wearers and non-eyeglass wear­ers. The classic orthoscopic high power (4 mm and 6 mm) eyepieces are notori­ous for their near-pinhole sized eye lens.

Television Observations

Each Surveyor spacecraft carried a television camera, and more than 86,000 70-mm pictures were obtained at very high resolution (to 1 mm). This photography pro­vided information on the nature of the surface terrain in the immediate vicinity of the spacecraft as well as the number, distribution, and sizes of the craters and boul­ders in the area. In addition to lunar terrain studies, the photography supported investigations of soil mechanics, magnetic properties, and composition of the sur­face material.

Lunar Surface Mechanical Properties

Mechanical property estimates are the result of interpretations of landing telemetry data and television pictures as noted above. Measurements from strain gauges mounted on the spacecraft landing gear were analyzed. The surface sampler, flown on Surveyor 3 and Surveyor 7, also obtained data on mechanical properties. To study soil erosion effects and to determine soil properties, the vernier engines and attitude jets were operated after the landings and the results observed with the television camera. This type of scientific investigation continued during the Apollo missions, with Apollo crews radioing observational information during landing, the impact of rocket exhaust with the surface produced dust clouds, trench digging, and providing core samples for study back on Earth.

Binoculars and Telescopes

Dickinson, Terence and Alan Dyer, The Backyard Astronomer’s Guide, 3rd Ed., Firefly Books LTD., 2008.

This is a comprehensive book that is a must have for any amateur astronomer, beginner or advanced. It provides coverage of telescope and binoculars, astronomical viewing, and astro-photography.

Dickinson, Terence, Nightwatch, 4th ed., Firefly Books, 2006.

One of the most recommended beginner’s guides to the hobby of astronomy. If one has never owned a telescope before, this is an excellent place to start.

Harrington, Philip S., Star Ware – The Amateur Astronomer’s Guide to Choosing, Buying, and Using Telescopes and Accessories, 4th ed., John Wiley and Son, Inc., 2007.

As the subtitle states, this book is highly recommended to help the sort through the maze of equipment available for anyone in the market for astronomy equip­ment. This book provides a consumer’s guide of most of the brand name astronomy equipment available in the marketplace.

Consolmagno, Guy and Dan M Davis, Turn Left at Orion, Cambridge University Press, 1989.

An excellent observer’s book highlighting a hundred night sky objects that can be seen through modest sized telescopes. A section of the book is devoted to the Moon, with galaxies, nebulae, and star clusters comprising the rest of the book. The beauty of this book is its presentation of each objects view as seen naked eye, though a finder scope, and then through the eyepiece of a telescope. Highly recommended.